Sunday, January 17, 2016

Rosemary Garlic Butter Steak


While I really love a tender juicy well seasoned steak, it's just not something I eat often. When I saw this recipe on Pinterest for Rosemary Garlic Butter Steak, I knew it was worth a shot. I like rosemary; I like garlic; and I like butter. How can it get any better? And the gamble paid off! This steak is very tasty and most definitely worth a shot!

4 rump steaks (or one or two larger cuts) (1 to 1.5-inches thick), room temperature
2 or 3 garlic cloves
2 Tbsps fresh rosemary leaves
3 Tbsps butter
1 Tbsp olive oil
Salt and pepper
A splash of white or red wine


Dice the rosemary and garlic and mash together with the salt in a mortar and pestle.


Rub mixture on both sides of the steak. Allow to rest for 15-20 minutes.


Heat a skillet over medium/high heat and melt butter. Add oil to prevent it from burning too much. Add steaks, season them with pepper and cook 1 or 2 minutes on each side.


Turn it over. Cook it 2 or 3 more minutes and add the wine (you can add extra garlic and rosemary now too to the skillet). It will steam furiously. Cook the steak 2 or 3 additional minutes for medium rare, remove steaks and let rest for 5 minutes. 
Meanwhile, cook the wine until reduced and a kind of sauce is formed. Slice the steaks and pour the sauce over it.


Peanut Butter Fudge


There's not much more satisfying then finding a creamy melt-in-your-mouth fudge recipe. I have just such a recipe. For years, all the way back to childhood, my father made Chocolate Fudge for Christmas. That was the only type of fudge he ever made. I've had samples at candy stores I've gone to over the years, but it never occurred to me to make anything other than chocolate fudge at Christmastime... until 2014. I decided to give Peanut Butter Fudge a try, so I searched Pinterest and read a number of recipes to get ideas. While reading one of them, I realized that it was identical to my traditional chocolate fudge recipe, and the lightbulb in my head went off. So that's what I decided to try - my go-to recipe swapped out with peanut butter, and it was a major success. I made it again this past Christmas and put it in tins and brought some for the holiday party at work, and it clearly came out on top as one of the favorites. 
In 2014 I made a single batch of this, but in 2015 I ended up making a quadruple batch. Be warned, if you make this, then you'll probably be making it every year for years to come. It is worth it though. You can switch it up just a bit if you'd like at use crunchy peanut butter or add chopped peanuts to it. However you try it, I promise that this will be a big hit.

1 1/2 cups butter (plus more for the pan)
6 cups sugar
1 1/3 cups evaporated milk
2 cups creamy peanut butter
13 ounces puffed marshmallow cream
2 tsp vanilla


Butter the sides and bottom of two 9x13 pans. In a large soup pot, add butter, sugar and evaporated milk.

 
Bring to a boil over med-high heat. Boil until candy thermometer reaches 234 degrees Fahrenheit. 


Remove from heat and stir in peanut butter until incorporated. Stir in vanilla and marshmallow cream until incorporated and smooth. Pour into prepared pans. Once it has begun to set, cut the fudge. Chill it to help it set faster. It is a candy and can set at room temperature, but I find it lasts much longer and I enjoy the texture better when I store it in the fridge.


Saturday, January 16, 2016

Squash Casserole


It took me years to get around to eating squash. I mean, literally, years. I was in my 30s before I tried it. I'm still a little limited in how I eat it. I either like it raw and sliced or this casserole. This casserole is so flavorful. I'm sure you'll enjoy it if you give it a try. I got this recipe from my mom, but I'm not really sure where she found it from all of those years ago.

2.5 to 3 lbs of squash (cubed)
1 large onion (diced)
1 stack saltine crackers (crushed)
3 Tbsps melted butter
1 egg
1 cup milk
add salt and pepper to taste
1 to 2 cup shredded cheddar cheese (save 1/4 cup of cheese for later)


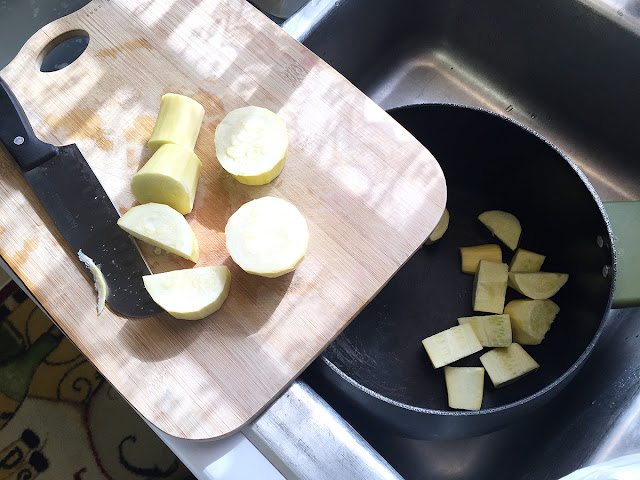
Cut squash and dice onion.


Cover with water and boil squash and onion with salt and pepper until squash is fork tender.


Drain water and mash squash until you reach the texture you prefer - I do not like large chunks of squash, so I mash mine quite a bit.


While squash and onion are cooking, gather remaining ingredients in a large bowl. Start with the crackers - a trick I've learned when you need to crush a whole pack of crackers is to push the crackers down to one end and then force them into a slant with your fingers. Then start crushing. Do this over the bowl you're using to catch any crumbs. When it feels crushed enough, then just open one end and pour the crumbs in the bowl.


 Add the egg, milk, melted butter and most of the cheese to the crackers.


When squash is cooked, drain water and mash squash and onion.


Combine with other ingredients and mix well.


Pour into a greased casserole dish, and bake at 400 degrees about 45 minutes or until top is golden brown.


Sprinkle remaining cheese over hot casserole.


Herb Roasted Potatoes


Potatoes are another item that is very versatile and a common staple in my kitchen. This recipe, specifically, I found on Pinterest at Lemon Herb Roasted Potatoes. I have made this recipe several times, and they are delicious every single time. I've used fresh herbs and dried herbs; I've used russet and fingerlings and small golden butter potatoes and more. This recipe is delicious no matter how you decide to try it. I often fix these with my Chicken Piccata, and they accompany it well. The recipe is rather simple, but it does take a bit of time to roast the potatoes correctly, so plan accordingly.

6- 8 large sized russet potatoes, peeled (if desired) and cut into 1½ to 2 inch chunks
juice of one lemon
¼ to ⅓ cup olive oil (butter or other oil will work as well; a butter/olive oil combination is very good too)
½ tsp kosher salt
½ tsp cracked black pepper

1/2-1 tsp garlic powder
1½ Tbsp dried herbs, oregano, thyme and rosemary are good choices


Preheat oven to 375 degrees, and while it is heating up, place the roasting pan in the oven to heat up. Allowing the pan to get hot will help keep the potatoes from sticking when you put them in the oven. 

Peel (if desired) and cut potatoes. Boil them for only four minutes.


Drain the potatoes.


Add lemon juice and toss potatoes until they absorb it all.


Add oil and herbs and toss potatoes.


Once pan is hot, pull it from the oven and pour the potatoes in the pan.


Roast potatoes for 60-75 minutes, stirring and turning potatoes every 15 minutes or so, until potatoes are tender with crispy edges. Pair with your favorite meal and enjoy!


Friday, January 15, 2016

Chicken Piccata


When it comes down to it, I just really like chicken... grilled barbecue chicken, chicken and dumplings, fried chicken, lemon pepper chicken, chicken tenders, chicken parmesan, chicken tamales, and now this new addition to my arsenal... chicken piccata. Oh my goodness, this stuff is so delicious! The lemon juice just adds a freshness to the dish, and the capers add an awesome briny-saltiness to it that you don't get just from salt. The chicken itself is so juicy, and the panko bread crumbs add a wonderful texture to the dish. I found the recipe on Pinterest, Panko Crusted Chicken Piccata, and I've made it several times already. Try this dish and I'm sure it will become one of your go-to meals.

1 cup flour
3 eggs, lightly beaten
2 cups panko breadcrumbs
4 skinless, boneless chicken breast halves,
Salt, pepper, and garlic powder
½ cup olive oil
6 Tbsps butter
1 Tbsp capers
2 Tbsps lemon juice + A few slices of lemon
1 Tbsp chopped parsley


If the chicken breasts are too thick butterfly them so each piece is half as thick as it was to begin with. Fold a piece of plastic over the top and bottom of each piece of chicken, then use a meat mallet (preferably flat and not pointed) or rolling pin to pound it to a ¼ inch thickness. Season both sides with salt, pepper and garlic powder.
Place the flour, eggs, and panko in three separate shallow bowls.


Heat half of the olive oil in a large skillet over medium heat. Dredge the chicken breasts in flour, shake off the excess and then dip in the eggs.


Then coat both sides with breadcrumbs.


Add half the dredged chicken breasts to the skillet and fry for 3-5 minutes or a side or until golden brown and cooked through. Remove to a plate. Add the other half of the oil to the skillet and repeat with remaining chicken breast.


When the chicken has been removed, add the butter to the skillet and use a spatula to scrape up any brown bits. Let the butter cook until sizzling and just starting to brown. Stir in the capers, lemon juice, and lemon slices (if using).
To serve, plate the chicken then spoon the lemon butter sauce over top. Top with lemon slices and fresh parsley.


Saturday, January 2, 2016

Butter Cake with Chocolate Mocha Buttercream Icing


Cake. Butter cake. Rich, light, amazing texture buttery goodness. Smothered in buttercream icing, but not just regular buttercream icing. Chocolate buttercream icing... chocolate mocha buttercream icing. Is your mouth watering yet? Mine is remembering this awesome cake. It is absolutely amazing. Like I said, the texture of the cake is amazing, and the icing is sweet and full of chocolate goodness with just a hint of mocha. Get a bottle of chocolate and white chocolate shavings to decorate, and whoever you make this cake for will feel wonderfully special. You'll want to make this. I promise. And it's really not very hard to make. Simple actually. You make the cake with simple straightforward ingredients, and the recipe is very straightforward to follow. You can make this, and you should make this. Seriously. Of course I found the recipe for this cake on Pinterest as Old Fashioned Butter Cake.

2 cups all-purpose flour, sifted
1 1/4 cup sugar
1 Tbsp baking powder
1 tsp salt
1/2 cup butter, softened
1 cup milk
1 tsp vanilla extract
2 eggs


Preheat oven to 350 degrees. Grease and flour two 8 inch x 2 inch baking pans and set aside.

In a large mixing bowl sift together the flour, sugar, baking powder and salt.


Add butter and mix until mixture looks like fine crumbs.


Add milk and vanilla and beat for two minutes, occasionally scraping down the sides of the bowl. 


Add eggs and beat for 2 minutes more.


Pour batter into prepared pans, dividing equally between the pans. Bake 30 to 35 minutes, or until a toothpick inserted into the center comes out clean.

 
Remove from oven. Cool in the pans for 10 minutes and then turn cakes out onto a cooling rack to cool completely.


Chocolate Mocha Frosting

1 cup butter
4 cups powdered sugar (a 1 lb box)
2/3 cup cocoa powder
1 tsp vanilla extract
1/2 tsp almond extract
1/4 tsp ground espresso powder
enough milk or heavy cream to reach spreading consistency


Using whisk attachment, cream butter. Add vanilla and almond extracts and mix. Add about half the powdered sugar, cocoa and espresso, on low speed mix until the dry ingredients are incorporated. Add remaining powdered sugar and mix until incorporated. Scrape down sides of the bowl, then whisk icing on med-high speed until it begins to lighten in color. Add milk or cream sparingly until a spreadable consistency is reached.

Juicy Barbecue Chicken


Earlier this year I discovered brining. Have you ever brined any meat you've cooked? It is a wonderful technique, especially with boneless chicken breasts. Since there's no fat on them, when grilled, they tend to dry out. I wanted to make some barbecue chicken this summer so I searched and found this recipe on Pinterest for Simple Grilled BBQ Skinless Boneless Chicken Breast. I had never brined my meat before, and thought the recipe looked pretty good, so I decided to give it a try. It's so awesome that I've searched for other recipes that use brining. As with many recipes, I used this one as a starting point and then changed it up to fit our needs. This is the beauty of brining - you can add whatever you want to infuse your meat. This recipe yields juicy, delicious chicken. I've received rave reviews from everyone I've shared my barbecue chicken with. Try brining your chicken. You won't regret it!

3-5 chicken breasts
3 cups water
3 Tbsps brown sugar
3 Tbsps salt
1 tsp cayenne
3-4 cloves of garlic, crushed

rosemary, thyme, poultry seasoning, mustard seeds, bay leaf (or whatever flavors you enjoy)
Jack Daniels spicy barbecue sauce

Prep the chicken by cutting off any fat or unappetizing parts and poking holes all over both sides of the chicken. 

Prep the brine by combining all the ingredients in a large tupperware container. Put the chicken in the brine. The original post says to only brine for 20 minutes, but I leave my chicken in the brine in the refrigerator for about two hours. 

Prep the grill, and while it's heating up, remove the chicken from the fridge and prep for grilling - rinse off the chicken breasts and pat dry with a paper towel.

Apply a coat of barbecue sauce to both sides of the chicken and put on the grill. Grill for five minutes; flip chicken; apply more sauce. Flip and sauce every five minutes for 25-30 minutes until chicken is done. Add some hotdogs or sausages to the grill. Enjoy!


Friday, January 1, 2016

Baked Beans


I like beans... black eyed peas, pintos, limas, kidney beans, and much more. Baked beans, however, have never really been at the top of my like list. To be more accurate, I've never really cared for baked beans. I never even bothered to make them for other people because I disliked them so much. Then I saw this recipe on Pinterest for Smoky Bourbon “Baked” Beans, and it looked so good that I decided to give it a try. The first attempt was pretty much a disaster. I used dry beans, but I failed to soak them overnight. The flavor was present in the final product, but the beans were still quite tough. So I rallied and came at it a second time... Success!!! Oh my goodness, they were so tender and so flavorful. I made these again for our Holiday Party at work, and the crockpot came back to me dry as a bone. The real beauty of this recipe is how very easy it is to prepare. Whether you like baked beans or not, you should give these a try. They really are that good. I'm going to give you the ingredients that I used, but feel free to check the original recipe. 

4 cans great northern beans or navy beans
3-4 cups chicken stock
1 small onion, finely diced
2-4 cloves garlic, pressed through garlic press
Salt and black pepper to taste
¾ cup ketchup
¾ cup BBQ sauce
1 ½ Tbsps tomato paste
Pinch or two ground cumin
Pinch or two smoked paprika
¼ cup plus 2 Tbsps brown sugar
1 Tbsp molasses
Olive oil
9 oz Oscar Meyer real bacon bits
2-3 tablespoons maple syrup

Drain and rinse the beans, and place in a a large pot or a crock pot.


Next, add the diced onion; garlic; a few generous pinches of salt, cracked black pepper, cumin and paparika; ketchup, BBQ sauce, tomato paste, brown sugar, molasses and a generous drizzle of olive oil. Pour chicken stock until all the ingredients are covered.


Stir the ingredients together. Simmer on auto heat in the crockpot or bring to a boil and then lower heat and simmer until the beans are tender and the sauce is thickened. In the crockpot it takes six to eight hours and on the stove it takes about four hours. Right before serving add 2-3 Tbsps of maple syrup and the bacon bits and mix well.


Enjoy the amazing flavors that these beans offer with your favorite barbecue!