Showing posts with label bread. Show all posts

Monday, October 19, 2020

Multigrain Bread


I love bread. There's not too many smells better than yeast and flour baking together in a hot oven. The smell permeates the entire house causing your mouth to water in anticipation of that warm bread slathered in a delicious salted butter. I do believe that this combination is truly a bite of heaven.

This recipe came about because of a girls visit to the beach with my mama and my daughter this summer. We found this little bakery, and with noses and mouths covered we ventured inside to see what they made. One of their specialties was homemade bread with no preservatives, and my mom decided to try a piece of their multigrain bread. 

As we were walking back to the car, my mom said, "You could totally make a multigrain bread like that." Well, yeah, I guess I could. I've been experimenting with bread making during the pandemic, and I've gotten much better at it. And since my mama asked me to, well... 

I did some research, and ended up coming up with my own recipe. I did goof on the photo and forgot to add the sugar and olive oil to the ingredients, so don't forget those. But you know what? It's pretty tasty. It's got a great texture, and overall it's pretty darn healthy as bread goes. If you want  to make it "whole wheat" you just need 51 percent whole wheat flour, so increase whole wheat flour to 2 cups and reduce the bread flour by 1 cup. 

You're going to want to give this recipe a try. You're family won't be disappointed. I promise!

 2 1/2 to 3 cups bread flour
1 cup whole wheat flour
1/2 cup multigrain hot cereal (I use a 10-grain version)
2 cups boiling water
2 1/4 tsp active yeast
1 Tbsp sugar
1 Tbsp olive oil
1 tsp barley malt
2 tsps salt
1 tsp pepitas or sunflower seeds
1 tsp triticale or oats
1/2 tsp flax seed
1/2 tsp poppy seeds
1/2 tsp oat bran
1/2 tsp sesame seeds
1/2 tsp everything bagel seasoning


Put the 1/2 cup of multigrain cereal in your stand mixer and add 2 cups of boiling water. Stir until combined. Allow to rest 30-35 minutes, stirring occasionally
until the mixture cools to 100-110 degrees Fahrenheit.


Add poppy seeds, flax seed, sesame seed and oat bran to a small bowl; combine well. Put pepitas and triticale in another small bowl. I don't put these together because I've found that they don't blend well; they separate.


Add 2 1/4 tsp active yeast and 1 Tbsp sugar; stir. Allow to rest and bloom for about 10 minutes. The top should be foamy, and you should be able to smell the yeast.


Add 1 Tbsp olive oil (use a good one with flavor to add depth to your bread), 2 tsps salt, 1 cup whole wheat flour, and 2 1/2 cups bread flour. Begin mixing and kneading the dough with a dough hook; knead for 8 minutes. Add flour about a tablespoon at a time until the dough doesn't stick to the bowl anymore. Proceed cautiously, and try not to add too much flour.


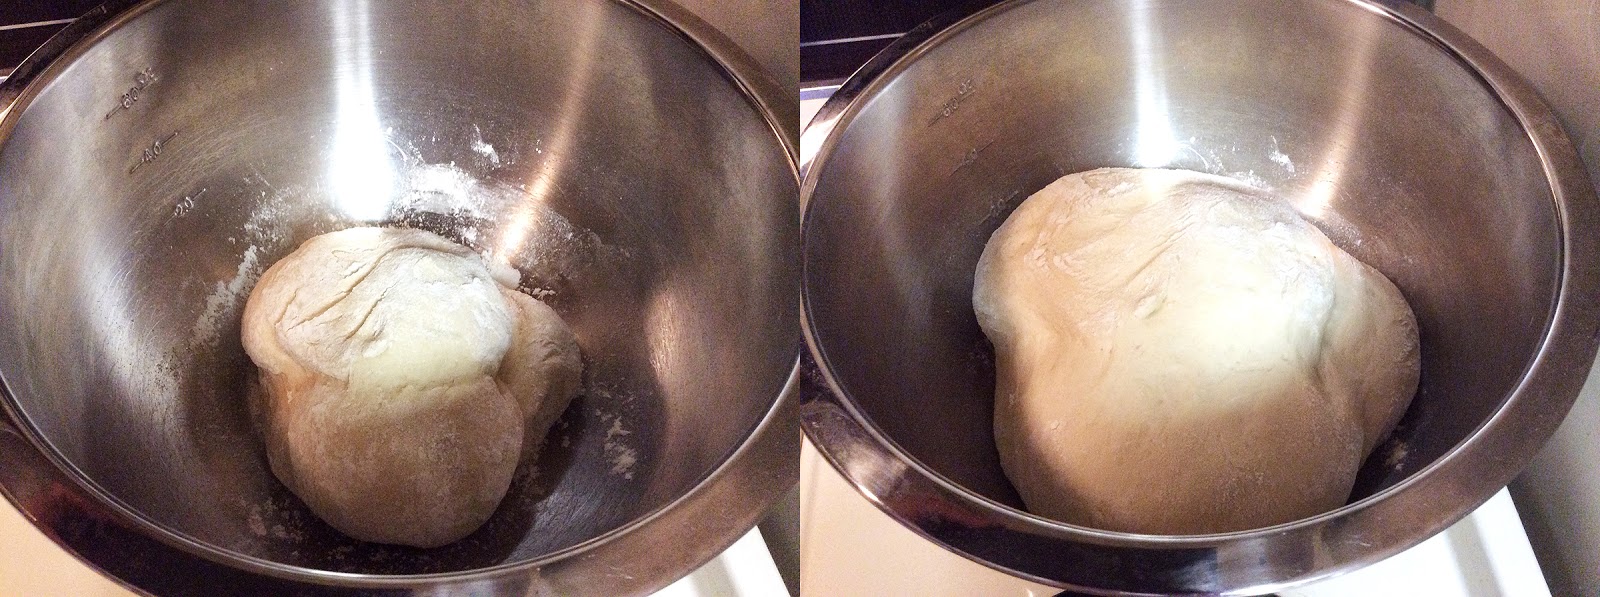
Place dough in a well-oiled bowl - I use a spray bottle of olive oil; it gives me good coverage without wasting too much. Cover with a clean tea towel, and allow to rise for 90 minutes.


Punch down dough and knead on a clean cutting board a few times. Decide what shape you're making your bread. I've made this batch as six small sandwich-shaped loaves, two round loaves, and one round loaf or one long oblong loaf. Any version is fine. Gently shape the loaf, pinching  together on the bottom. Ensure it is smooth. I did mine in two loaves - sprinkle about a quarter of the seeds on the the board and roll the bottom of the shaped loaf in the seeds to press them into it. Place the loaf on a silicone baking mat on a cookie tray. 


Cover with a clean tea towel and let rise for 30 minutes. I lightly spritz mine with a little water so they don't dry out. Turn the oven to 425 degrees Fahrenheit. Put a small pan of water in the oven and let it heat up.


Put another quarter of the seeds on top and gently press them info the dough. Sprinkle a little flake salt on top, about 1/8 tsp or so. Do the remaining loaves. Slice the tops of the loaves and then spritz with water. Put the bread in the oven and spray several more times. Close the door quickly and bake bread for 25-30 minutes until the bread is golden brown and sounds hollow when you tap it. My oven is crazy and cooks unevenly, so about 10-12 minutes in when I turn the pan, I cover the loaves with aluminum foil.


Let cool, and enjoy this delicious bread with some tasty salted butter!


Saturday, December 27, 2014

Rustic No-knead Bread


There isn't much better than a warm, fluffy piece of bread. It is amazing. And being able to make your own bread so that you can eat it warm right out of the oven is even better. So, to add to the decadence, here is another bread recipe. I found it on Pinterest as Fast No-Knead Bread. It's a rustic, no-knead bread with a very simple recipe. You really CAN do this, so give it a try!

3 cups bread flour
1 packet (1/4 ounces) instant yeast
1 1/2 teaspoons salt
Oil, as needed


Combine yeast and about a teaspoon  of sugar in a large bowl with the 1 1/2 cups water. Whisk lightly until blended.


Add flour and stir until blended; dough will be shaggy.

 
Cover bowl with plastic wrap. Let dough rest about 4 hours at warm room temperature, about 70 degrees.


Lightly oil a work surface and place dough on it; fold it over on itself once or twice.


Cover loosely with plastic wrap and let rest 30 minutes more.
At least a half-hour before dough is ready, heat oven to 450 degrees. Put a 6-to-8-quart heavy covered pot (cast iron, enamel, Pyrex or ceramic) in oven as it heats. When dough is ready, carefully remove pot from oven. Slide your hand under dough and put it into pot, seam side up. Shake pan once or twice if dough is unevenly distributed; it will straighten out as it bakes.


Cover with lid and bake 30 minutes.


Remove lid and bake another 15 to 30 minutes, until loaf is beautifully browned. Cool on a rack.

Sunday, June 15, 2014

Easy Homemade Bread


Here's another installment in my homemade bread making quest. I've tried this recipe twice now, and it's quite tasty. I found the original, Simple One Hour Homemade Bread, on Pinterest. It is very straight forward and simple, and the texture of this bread is fantastic. It can be used for sandwiches or just as a side dish, or heck, just eat it warm with some butter like I did! This is a good one to try also if you're new to bread making.

5 1/4 cups white bread flour
3 Tbsp sugar
1 1/2 tsp salt
1 1/2 Tbsp yeast
1 1/2 Tbsp oil
2 cups warm water (somewhere between 100 and 115 degrees Fahrenheit)


Add the warm water, yeast, and sugar to your bowl and allow the yeast to activate, about 8 minutes or so.

 
Add oil, salt, and flour. 


Mix for 1 minute and then check the consistency of the dough. The dough should be very sticky. If it is too dry, add more water. Mix for 5 minutes. (Do not add any more flour after the dough has finished mixing.)


Spray kneading surface with cooking spray and turn dough out onto surface. Knead dough briefly until it has a smooth even consistency (this will only take several turns of the dough to accomplish).


Divide dough into 2 pieces (or more if you wish to have smaller loaves) and shape loaves into desired shapes and place on greased baking sheets. Cover with a large dish towel and let rise for 25 minutes.


While loaves are rising, preheat oven to 350 degrees Fahrenheit. When loaves are ready to go into the oven, use a sharp knife (you can lightly spray your knife with cooking spray to prevent dragging) to make several slashes in the top. Make each cut about 1/4-inch deep at a 30 degree angle.

 
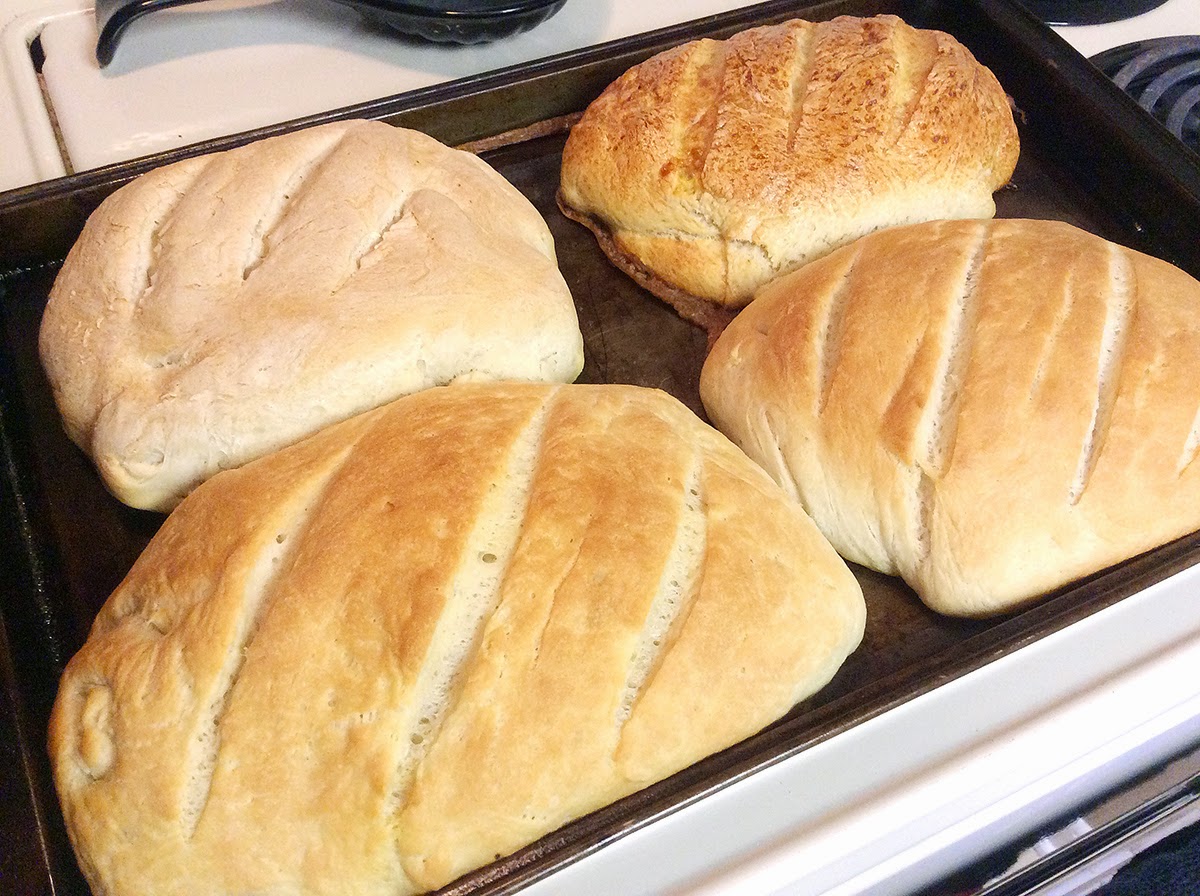
I decided to try an experiment the second time I made this bread. While the bread's texture was amazing, I wasn't terribly excited about the exterior of the bread. So, in my experiment, I divided the bread into four loaves, and topped each differently. Here's my results from top left, clockwise: plain as the recipe calls; egg wash, olive oil, butter. Clearly, the oil and butter created a much prettier topping than plain or an egg wash. Point is, try it how you like it, and choose what works for you.

Bake loaves for 25 minutes, or until they are golden brown.


Saturday, May 17, 2014

Amish Country Bread


I know I've mentioned this before, but I love bread. I mean really love bread. I think I could subsist off of a good bread. Until about a year ago, I thought bread was so hard to make, but it isn't! And since I got a 6-quart stand mixer for Christmas, it's gotten even easier. I've tried out a number of recipes, and I have more pinned to try out. This recipe for Amish Country Bread, which I found on Pinterest, of course, was really easy and only took a bit over an hour to make. It is goooood! And it makes two loaves, which is even better. If you want to try your hand at some homemade bread, then this is a good first-time recipe.


4 Tbsps sugar
1 1/2 cups hot water
1 Tbsp of rapid rise yeast
2 Tbsps butter
1 Tbsp salt
5 cups flour


If you have rapid rise yeast, then combine all the ingredients and mix in a mixer or by hand until the dough is ready, but not less then 10 minutes.

If you have active yeast, then combine sugar, water and yeast in your mixer and allow yeast time to activate, usually 5-8 minutes. Add salt, flour and butter and mix for 10 minutes.


Sprinkle some flour in a bowl, put the dough in it and let it rise for half an hour.


Cut the dough in half, make two balls and put in a baking pan after sprinkling some flour in it. Make some nice small cuts on top (see image) and let sit for 10 minutes.


Brush an egg and sprinkle some salt and rosemary. 


Bake for 25 minutes at 400 degrees.


Muffuletta-esk Sandwich


Despite my love of bread, I'm really not a big sandwich eater. I don't have anything against sandwiches, and the ones I do like, I really really like. I just don't eat them often. This little number is my own creation based on a sandwich I tried when I lived at Fort Polk, La. called a muffuletta. Please note, this is not a muffuletta though. I have not and will likely never be interested in an olive spread. Ever. And I fix my sandwiches very plainly. You may want to add some mustard or lettuce or other normal sandwich items to your version, but here's the basic form of it. I use a good sandwich roll, turkey, salami, and provolone. The key to these though begins with the bread! You must have a good bread for these. Kaiser rolls usually work good, but there are others that will work as well.

Bread rolls
2-4 slices of turkey
1-2 slices of salami
1-2 slices of provolone


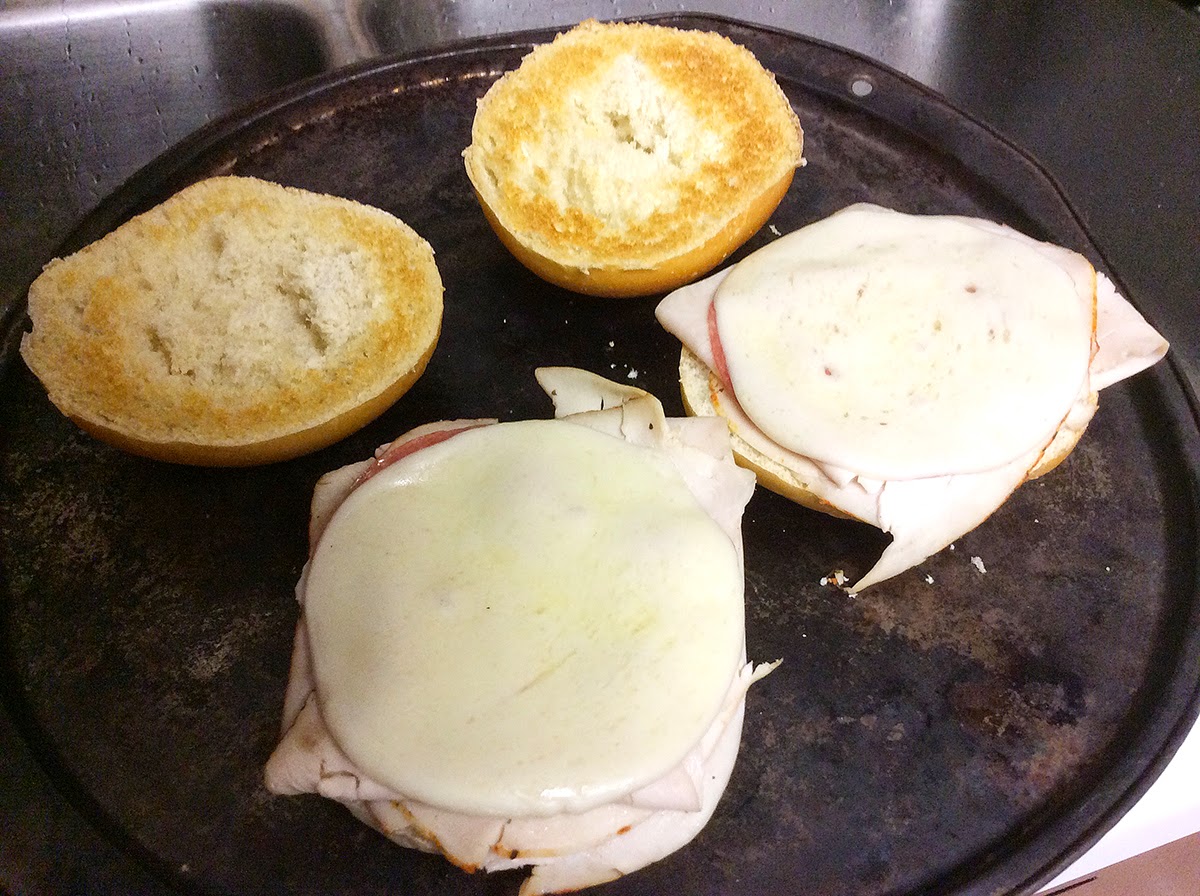
This is a very simple sandwich - all you do is layer the parts. Cut the roll in half and place on baking sheet. Depending on the size of your bread, layer 2-4 slices of turkey, 1-2 slices of salami, and 1-2 slices of provolone. For the sandwich pictured, I used 2 slices of turkey and 1 each of salami and provolone.


Turn oven on broil and toast sandwich until top of roll is golden brown and provolone has melted to desired consistency. Watch it closely. You may need to pull the tops and let the cheese melt a bit longer. The goal is to warm the meat and slightly melt the cheese.


Add some chips and a fruit salad, and you have a wonderful and fairly healthy meal!

Sunday, March 30, 2014

Lemon-Zucchini-Almond Bread


I think I may be in love. And it's not something I ever expected to love... lemon zest! I've never been a lemon fan. I don't like lemonade. I've never used lemon on anything. Ok, I do like the little sweet lemon drop hard candies, but that is it. This recipe is AMAZING. And to top off its amazing yumminess, you also get a little vegetable and some nut protein in each luscious bite! Woohoo! Now that's a win in my book. lol I found this recipe on Pinterest, and a previous bread I made, Lemon Almond Bread, was so good, that I decided to give this one a shot. It's called Glazed Lemon Zucchini Bread. The bread is really flavorful; the zucchini adds some depth to it; the almonds add a bit of texture; and the glaze is out of this world. I adapted the recipe just a little bit, but I can't give you a comparison because I never tried the original. Read them both if you so desire, and take your pick! You'll probably notice that the pictures don't look like the same thing, and it's actually not. I made a loaf of this last weekend to try it. Today, I doubled the recipe so that I could make more so that I could take it work tomorrow. It made a little more than I anticipated, so I ended up with a 9X13, a mini-loaf pan full, and a small loaf as well. Following is the single loaf recipe.


2 cups cake flour
1/2 tsp salt
2 tsp baking powder
2 eggs
1/2 cup canola oil
1 1/3 cups sugar
2 Tbsp lemon juice
1/2 cup buttermilk ***
2 Tbsp lemon zest
1 cup grated zucchini

1/2 cup almonds, plus a Tbsp or so for garnishing
Glaze ingredients:
1 cup powdered sugar
2.5-3 Tbsp lemon juice
1-2 tsp lemon zest


First prep your fresh ingredients - grate the zucchini and zest and juice the lemons. 
The original poster left the peel on her zucchini. I think it would have been nice for the color, but I have a picky eater, and it's much easier to hide the zucchini with the green removed.


Mix flour, salt and baking powder in a medium bowl and set aside. In a large bowl, beat eggs. Then add oil and sugar until well blended. 


Add lemon juice, buttermilk, and lemon zest to this mixture and blend all together.

*** Note, if you don't have buttermilk, you can make a substitute by using 1 Tbsp lemon juice and adding enough milk to reach the one cup line. Then use however much you need.


Fold in zucchini until it is mixed well. 


Add dry mixture to the wet mixture and blend all together until well combined.


Add almonds and mix well. Pour batter into greased 9x5 loaf pan.


Bake at 350 for 40-45 minutes. 


The original says to glaze the bread while it's still warm. I didn't want the heat of the bread to melt the glaze, so I let mine cool first. To make the glaze, mix the powdered sugar, lemon juice and zest until combined.


Carefully spoon glaze over bread. Garnish with a bit of zest and a few almonds. Your mouth should be watering at this point to try it, so go ahead and give it a taste!